Hey, let’s talk about something that’s been bugging a lot of folks who work with our stuff—damaged rubber insulation. If you’re running an HVAC shop, a commercial building, or even a small industrial space, you’ve probably run into this: those black, squishy rubber foam tubes or sheets that keep pipes from sweating and energy from escaping, getting nicked, torn, or cracked. I’m not just some blogger— I’ve been selling rubber insulation for 12 years, standing behind the counter answering calls at 8 a.m. when a panic text comes in from a guy who just ripped his pipe’s insulation on a metal valve. Today, I’m walking you through how to actually fix this without wasting time (or money), no fancy tools, no overcomplicating stuff. Rubber Insulation
First off, let’s cut the BS: not all damage is the same, and not all fixes work. I see new guys showing up with duct tape and calling it a day, but that’s just a band-aid that’ll fall off in 6 months, especially if you’re in a hot garage or a damp basement. Before you grab anything, stop and figure out what you’re dealing with. That tiny scratch from a pipe hanger? Total fixable. That 4-inch tear along a joint where the insulation rubbed on a pump? Also doable. But if the insulation’s mushy, crumbly, or moldy under the surface? You’re better off cutting that whole section out and replacing it— don’t waste your time on something that’s already failing. I learned that the hard way early on; sold a guy a repair kit for moldy insulation, he called me back a week later saying it was already peeling off. Oops.
Now, the prep— this is the part no one talks about, but it’s 70% of the job. Here’s what you actually need, no fancy stuff: a utility knife (new blade, don’t use that dull one from last month), rubbing alcohol (70% is fine, not the 90% stuff that dries too fast), a clean rag, and of course, the right repair material. Wait— that’s where most people mess up. You can’t use regular rubber cement for this. You need rubber insulation adhesive, the kind specifically made for closed-cell foam (that’s what 99% of our rubber insulation is). Don’t use construction adhesive, don’t use super glue. Grab the stuff that says “for rubber foam insulation” on the tube— I keep a case of it in my back room because it’s the difference between a fix that lasts 5 years and one that lasts 5 weeks. Also, if the tear is bigger than 2 inches, you’ll need a rubber insulation patch— same material as what you’re using, not a piece of random foam.
Let’s break it down by damage type, ‘cause one size doesn’t fit all. First, small damage— think scratches, tiny nicks, holes less than an inch across. This is the easiest, no headache. Step one: wipe the area with that rubbing alcohol and rag. I see guys skipping this all the time, and you’re like, “It’s a scratch, not a dirt road.” But if there’s pipe dust, oil, or even a little moisture there, the adhesive won’t stick. I once fixed a guy’s pipe nicks with glue, he turned it down fast, because he didn’t wipe it— the scratch was still dusty, and the glue just peeled off like a sticker on a wet notebook. Step two: cut a tiny piece of insulation (same material!) that’s just a little bigger than the nick. You don’t need a huge patch, just enough to cover the damage. Step three: dab a thin layer of adhesive on both the scratch and the back of your tiny patch. Don’t slather it— too much adhesive will squeeze out and leave a sticky mess that’ll attract dust. Step four: press it on firmly, hold for 30 seconds, then smooth out any bubbles with your finger. Wait, another pro tip: if it’s a really small hole, you can even use a little extra adhesive to fill it in, but only if it’s less than ¼ inch. Too big, and you’ll end up with a lumpy spot that’ll tear again.
Next, medium damage— tears 1 to 4 inches, cuts that go all the way through. This is the most common one I get calls about. I had a HVAC tech named Jake hit me up last month, he ripped a 3-inch tear on a hot water line, said he was panicking ‘cause the pipe was sweating so bad it was dripping on a brand new furnace. Here’s what we did for him. First, prep is still key: clean the area around the tear (about an inch on each side of the damage) with alcohol, make sure it’s completely dry— no dampness, not even from condensation. Second, since this is a full-through tear, you can’t just patch it on the outside. Wait, the insulation is two layers usually? No, most rubber insulation is a single closed-cell layer, but when you have a tear that goes all the way, you want to make sure you’re sealing both sides? No, actually, the pipe side is against the metal/pipe, so the tear is on the outer layer. Cut a patch that’s at least 2 inches bigger than the tear on all sides. So if your tear is 3 inches long by 1 inch wide, your patch is 5 by 3 inches. Trust me, overlapping more is better than too little. Third, apply adhesive to the back of the patch and the exposed area of the insulation around the tear. Wait, don’t apply adhesive to the pipe! That’s a mistake I see sometimes— glue on the pipe makes it hard to fit the insulation back right. Just the insulation surfaces. Fourth, align the patch perfectly over the tear, press down starting from the center and working outward to push out all air bubbles. That’s another mistake— if you push from the edges, you trap air in the middle, and it’ll lift. Fifth, once it’s pressed, run your finger around the edges to make sure the adhesive is spreading out, and wipe any excess off with a rag (just don’t wipe it for 10 minutes while it’s setting). Jake did this, and he texted me a pic 2 weeks later, said it’s still holding, no more dripping. Win.
Now, the big one— large damage, tears bigger than 4 inches, or insulation that’s come completely loose from the pipe. This is where I see people either make it way too complicated or just replace the whole thing when they don’t need to. Let’s say a whole section of insulation peeled off because someone bumped it, or a tear that’s 6 inches long. First, do a quick check: is the pipe itself damaged? If it’s rusted, or leaking, fix that first— insulation isn’t a fix for a bad pipe. If the pipe’s good, let’s go. First step: remove the old, loose insulation. Don’t just yank it off, you don’t want to scratch the pipe (that’ll cause rust later). Use your utility knife to cut it away neatly. Second, clean the entire area where the insulation was stuck— use alcohol to get rid of all old adhesive, pipe dust, oil, whatever. You need a super clean surface for the new stuff to stick. Third, measure the length you need, and cut your new insulation (or a patch big enough to cover the whole damaged section— sometimes a piece of full tube is easier for straight pipe) to size. Wait, if it’s a tube insulation, make sure you cut it along the slit where it opens up for pipes— don’t cut it the wrong way. Fourth, apply adhesive to both the inside of the new insulation (the part that touches the pipe) and the pipe itself. Wait, hold on— a lot of guys say don’t put adhesive on the pipe, but for loose insulation that’s re-applied, a thin, even layer on the pipe helps it stick better. Just don’t slather it. Fifth, slide the insulation on, press it firmly all the way around. Now, for the seam of the insulation (that slit you used to put it on), apply a thin bead of rubber insulation adhesive along the seam, and smooth it out with your finger. Then, if there’s still a gap, you can use a small strip of insulation to cover the seam, just like the medium tear fix. For the big tears, I always recommend letting the adhesive cure for at least 24 hours before turning on the line (heating or cooling). I’ve had a few guys skip this, turn the AC on 2 hours later, and the insulation shifts ‘cause the adhesive wasn’t set. Not the end of the world, but a waste of time.
Wait, what about that time-sensitive stuff? Like, if you have a pipe that’s sweating so bad it’s dripping all over a work area right now, and you can’t wait 24 hours? I get that. Sometimes you need a temporary fix to hold you over until you can do a proper repair or replace the insulation. But please, don’t use duct tape. Use a self-sealing rubber tape— that’s the stuff specifically made for this, not electrical tape. It’s stretchy, sticks to itself, and won’t peel off from moisture or heat. I keep a roll in my truck for exactly these emergencies. But here’s the fine print: that’s a temporary fix, max 30 days. Don’t leave it on longer than that, ‘cause self-sealing tape isn’t meant for long-term use.
Now, let’s talk about mistakes to avoid— the ones I see every single day, and that cost people time and money. First, using the wrong adhesive. Regular contact cement? Nope, it eats away at rubber insulation. Super glue? Way too brittle, cracks in a month. Duct tape? Temporary fix, not permanent. Second, not letting it cure. I can’t stress this enough. Adhesive needs time to bond. Follow the package instructions, but general rule is 24 hours for full cure, 1-2 hours for light handling. Third, not prepping the surface. Skipping the alcohol wipe is like painting a dirty wall— it’ll peel. Fourth, overlapping too little. If your patch only covers the tear by a half inch, it’s gonna pull right off. Rule of thumb: 2 inches overlap on all sides for medium tears, 3 inches for large. Fifth, ignoring mold or mushy insulation. If the inside is crumbly or has black mold, that insulation is already broken down, and a patch won’t fix it. You have to replace that section. I’ve had a guy come back to me last year, tried to patch moldy insulation, called it “the worst repair I’ve ever done,” ended up replacing the whole section and saved himself from a bigger problem later.
Quick question I get a lot: can I paint rubber insulation? Yeah, but only if it’s cured completely, and you use the right paint— water-based latex is fine, not oil-based, ‘cause oil breaks down the rubber. But honestly, I rarely recommend it. The only time you might need to is if the insulation is in a space where it needs to match other surfaces, or for UV protection if it’s outdoors. But otherwise, patching and sealing is enough.
Now, when is patching not worth it? Let’s be real. If the insulation is more than 50% damaged, if there are multiple tears, if it’s crumbly or moldy, or if it’s more than 10 years old (rubber insulation breaks down over time, even if it looks fine on the outside), replace it. Trying to patch that is just throwing money down the drain. A new piece of insulation is way cheaper than fixing repeated bad repairs, and it’ll keep your energy bills lower too— that’s the whole point of insulation, right? Not to have a spotty fix that lets cold or hot air escape.
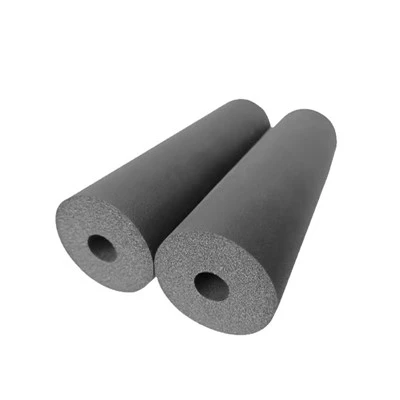
At the end of the day, repairing rubber insulation isn’t rocket science, but it’s also not just slapping tape on. Prep, use the right materials, don’t skip the cure time, and know when to patch vs replace. If you’re not sure what kind of damage you’re dealing with, or you need the right supplies, hit me up to connect with our team. We’ve got custom rubber insulation, repair kits, adhesives, and all the stuff you need to get the job done right. No hidden fees, no weird fine print— if you need a bulk order, or just a single roll for one small pipe, we can hook you up. Don’t let a little damaged insulation turn into a big, expensive headache. Reach out to our team to chat through your project or get the supplies you need, and you’ll have that pipe sealed up in no time.
Glass Wool Insulation References
- ASHRAE Handbook: Heating, Ventilating, and Air-Conditioning Systems and Equipment. American Society of Heating, Refrigerating and Air-Conditioning Engineers, 2021.
- ASTM C1116 / C1116M-21: Standard Specification for Fiber-Reinforced Concrete. American Society for Testing and Materials, 2021.
- Rubber Foam Insulation: Installation and Repair Guidelines. Thermoplastics and Rubber Association, 2020.
Langfang Yafeng Energy-Saving Technology Co., Ltd.
As one of the most professional rubber insulation manufacturers and suppliers in China, we’re featured by quality products and good price. Please rest assured to buy bulk premium rubber insulation for sale here from our factory. Welcome to view our website for more information.
Address: Langfang Xinyafeng, Liugezhuang Town, Dacheng County, Langfang City, Hebei Province
E-mail: yafengbaowen@gmail.com
WebSite: https://www.xyfinsulation.com/
